Team: Raudia Kepper, Josh Knowles, Wendy Coutau
Week 1: Observations (Due October 17th 2005)
Choose an action that produces changes in a medium. It might be strumming a guitar (the medium is sound), hammering a nail (the media are wood, nails, and sound), flying a model plane (the media are the plane and the air). What tool or device is the action taken on? What is the goal of the activity? Observe a person or people engaged in the activity. What are the physical parameters of that activity? What does the person engaged in it do with their arms, their legs, their hands or feet, their head? How do they change their posture? Where do they need to focus their attention? Is there a secondary focus of attention (for example, if two limbs are used independently)? What physical elements of the activity make it engaging? What elements make it difficult, painful, or boring?
Do the action multiple times (perhaps 100 times), or have someone else do it. Record the action, with a video camera, or sensors feeding a graphing program, or in some other way. What patterns appear when the action is repeated?What are the physical characteristics of the medium that you have to take as given? What physical input to the tool or device suggest or mirror those characteristics? For example, how actions you take on an audio mixer mirror the inherent characteristics of sound? How does the arrangement of controls on a VCR suggest what each control does?
CONCEPT:
Our idea is to install a control at each table at a bar that would allow an individual to control the brightness and color of a single colored light in the bar ceiling (or other places one might have lighting). The goal would be to encourage interactivity and can act like an ice-breaker. This setup also will allow group control of the lighting; no more problems with everyone at the bar feeling like the place is too dimly lit or too bright.
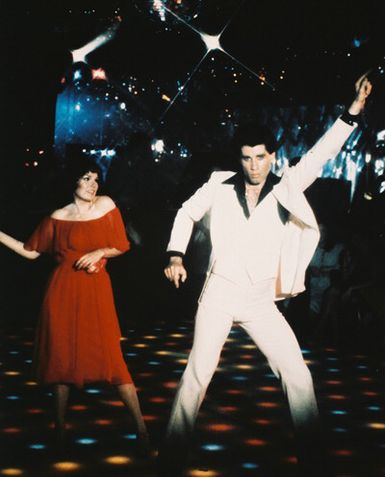
We were initially inspired by the idea of including social "toys" to a bar by a former New York City bar called "Remote Lounge" (remotemounge.com). We liked the idea, but knew of social problems that came along with including anonymous cameras in a space full of drunk people. A lighting system, we felt, could act as a social tool (ice-breaker, conversation piece), and a sort of collaborative art project as people chose the colors for the lighting system, and as a functional way to control the lighting in the space.
Spin-off idea based on remote lounge. (Brief description of remote lounge http://www.remotelounge.com)
This project would have dimmers placed at every table or portions of the main bar, each control one light on the ceiling or wall and another for its intensity. interactive yet discrete. Instead of having people stare at a screen, this encourages interactivity and can act like an ice-breaker. This setup also will allow/ let people control the mood of the scene through lighting.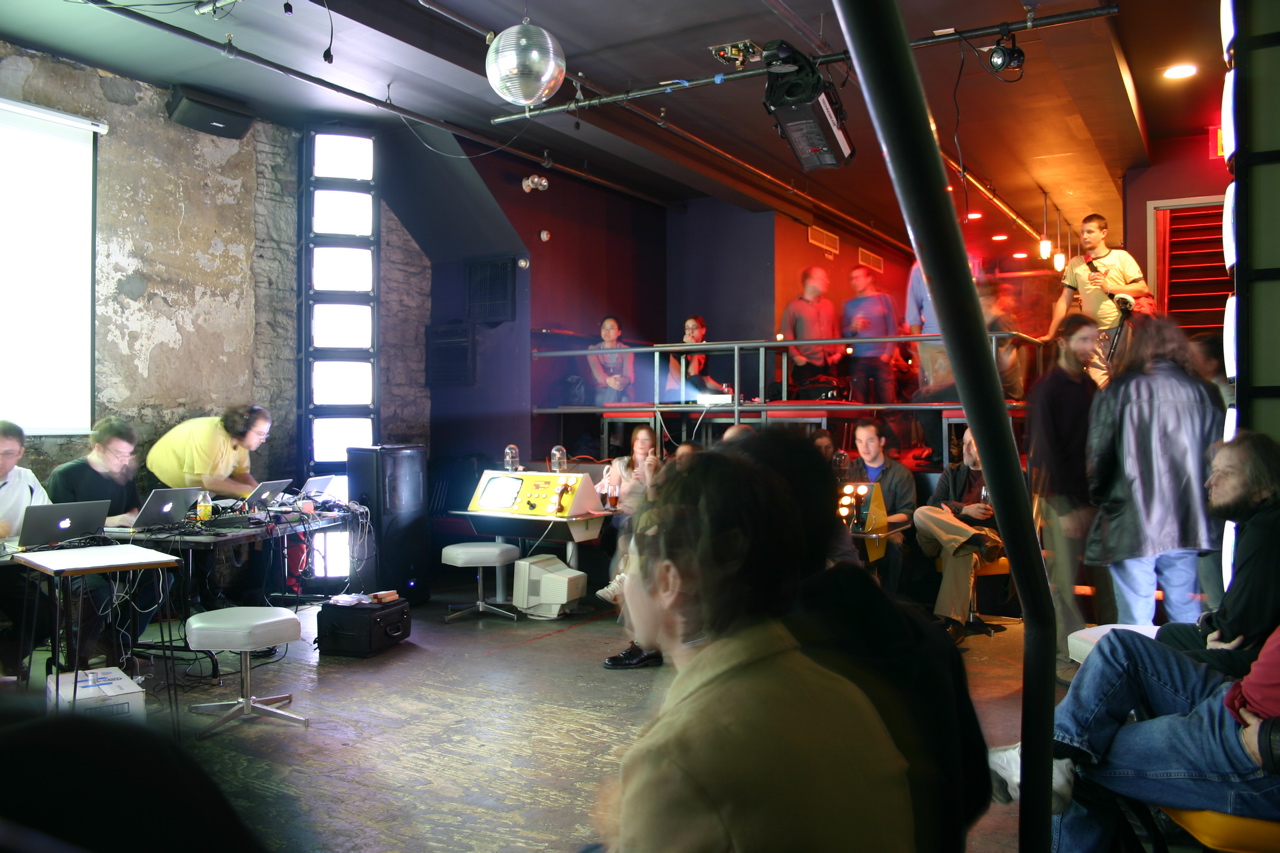
OBSERVATION:
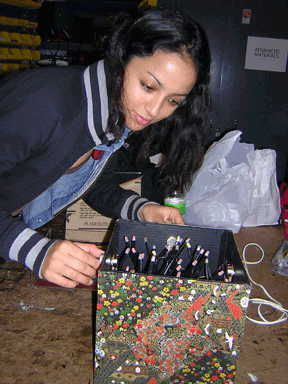
The action here is a turn of the hand and wrist to influence the medium - Light, by means of the use of our opposable thumbs. The result is a play of curiosity and satisfaction over a limited control of the environment. The simple action is centered on the tool - the potentiometer. The wiring should probably be kept short for a minimal amount of mess. Therefore the player will be sitting down, keeping an eye on the ceiling to find and watch the light that is being changed. Each potentiometer is used by one person at a time. But a group can watch the result. This is not intended for long periods of interaction. It is more geared towards being an ice breaker, a conversation starter in a social environment. The player will lose interest eventually as they engage more will their surroundings.
The action is simple and repetitive. The player would probably turn the pot 20 times at the most before moving on to something else. The player tends to turn the pot slowly at first to examine the effects and gradually turns it faster to see if the light will follow or flicker.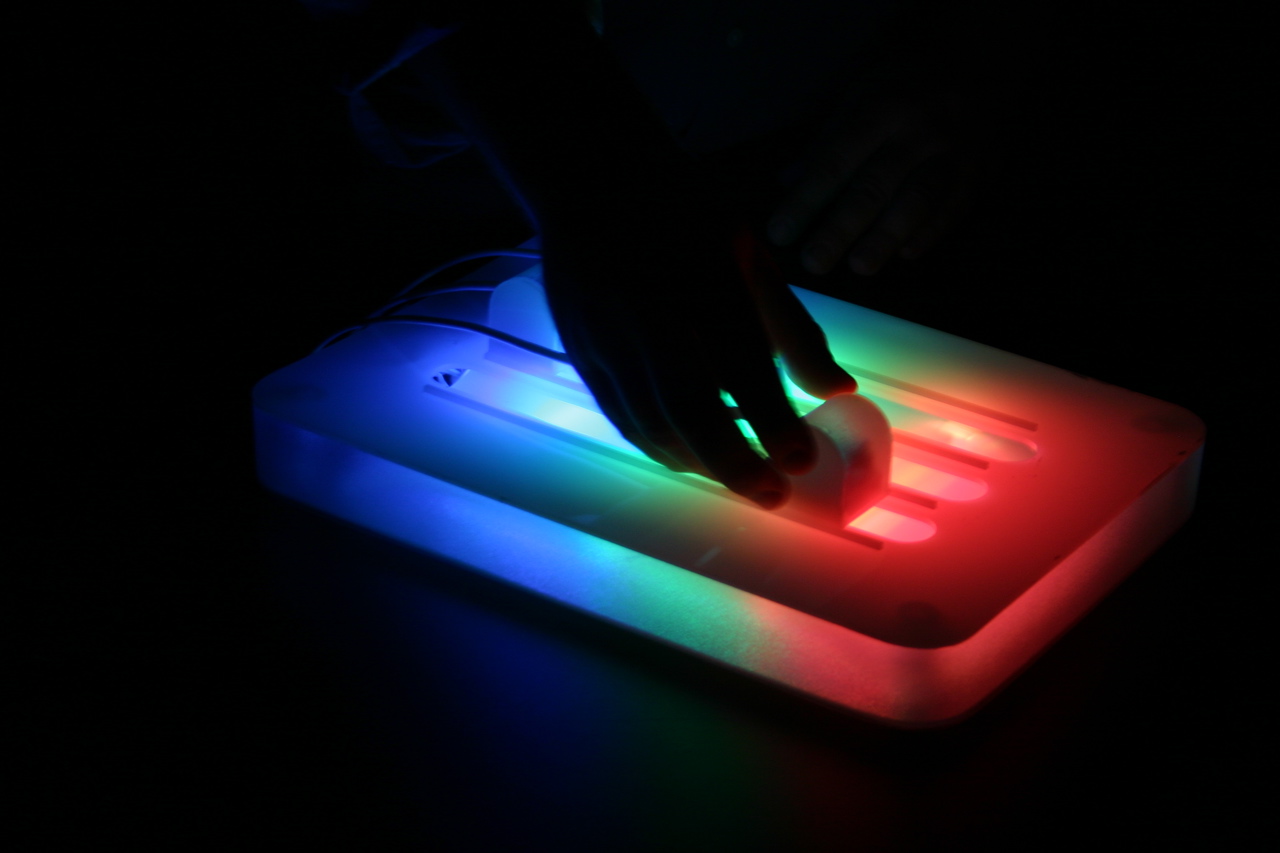
BASIC PROTOTYPE:
MATERIALS:
LEDs:
or
Week 2: early prototype (Due October 24th 2005)
Now that you've observed one tool or device that manipulates the medium you observed, create another one. Either modify an existing device so that it affords changes to the medium that it didn't previously, or make a whole new tool to manipulate the medium in new ways.
Ask yourself (and your intended users) why someone should use your device to do the job. Don't assume that someone will want to use it, or even know how to use it. Make the functions apparent, and figure out what will make a person want to use your device. How will it make their experience of the activity better?
Is your device dependent on other devices, or on a specific location, or on the arrangement of elements in a space? Where is is best used? What social situations (i.e in private, in front of an audience, in a crowd) are best for its use? How will you ensure that those conditions are met?
The initial idea has migrated out of the bar scene, into a more general area. The revised concept can be applied to a home, social or educational environment. It still comprises of interactive elements that will not isolate the players from eachother a screen would.
We gathered the materials we needed and a rubbermaid box as a container.
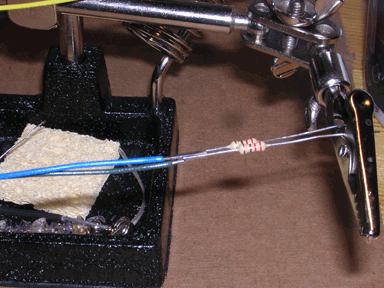
We started soldering LEDs to wires to make the legs longer and sodering the 220 Ohm resistors directly to the power leg of the LEDs, in oder to make them easier to put together on the board.
The only part of the project that we discarded so far, is the individual cubes. We thought of makign one big cube for the prototype and let the LEDs settle themselves. We also thought of using sliders instead of potentiometers
Here is the data sheet for the LEDs we chose.
Week 3: Advanced prototype(Due October 31st 2005)
Get other people to use your device, instrument or tool. Try as much as possible to tell them only what they need to get started. For example, if you made a musical instrument, just tell them how to produce changing tones; don't tell them what to play. If you made a device that writes text in response to eye movements, don't tell them what to write, just tell them how to make letters. Observe how your users use your device. Take notes on where they defy your assumptions as to how the tool is to be used. Ask them how they think the device works (their mental model of the action). Listen to what they have to say, and figure out where their mental model diverges from your model of how it works. Use this information to make the tool better.
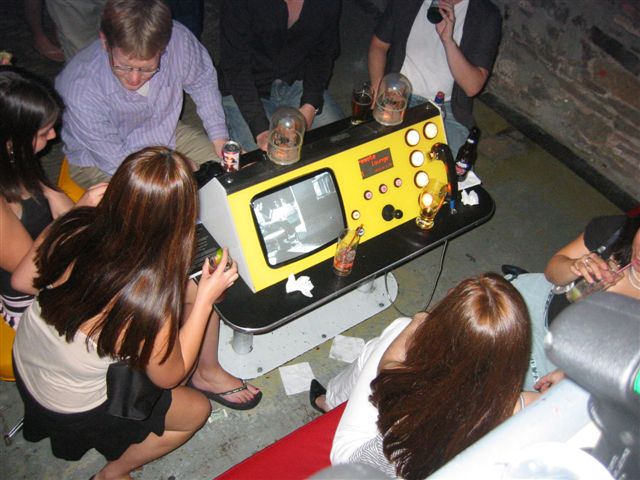
Description as of 10/31/05:
Week 4: Final prototype(Due November 7th 2005)
Based on all the information you've gathered, iron out any bugs, make any necessary interface revisions, and complete your device, instrument, or tool. Finalize the documentation of the process.
New Adventures in Soldering or, How we learned to stop worrying and love the LED.
Wendy Coutau, Raudia Kepper, and I worked together on our Pcomp mideterm project. During our initial few meetings, we decided that it would be interesting to make some sort of interactive lighting system for a bar or restaurant- something that acted as an art piece, a simple interactive toy, and a somewhat-democratic way for the patrons of a bar or restaurant to choose the lighting together. We felt this would be fun for patrons, but not consuming to the point of distraction.
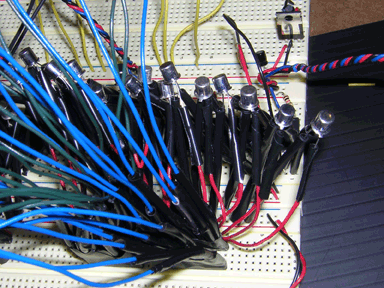
We decided to build a simple prototype with 36 tri-color LEDs arranged in a square. Three pots would control the colors of the LEDs in a kind of kaleidoscopic pattern: turning the Red pot, for example, would cause the red channels of the LED lamps to turn on, starting from the outside of the square and symmetrically moving towards the center. And the same would be true with the Green and Blue pots. We felt this would both allow interesting rainbow patterns to occur and allow the user to adjust the overall color coming from the device with a good amount of precision.
So we gathered our materials and began to build our prototype. I wrote a demo in Processing so we could see what the end effect might be and I quickly wrote the code for the PIC chips. This PIC code never changed over the course of our project.
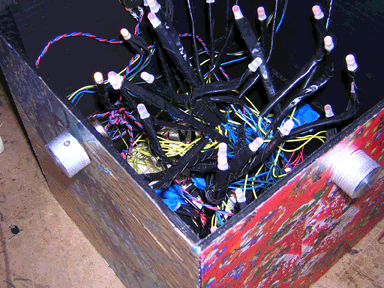
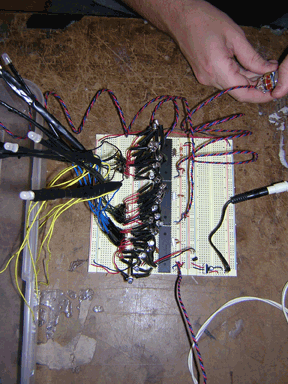
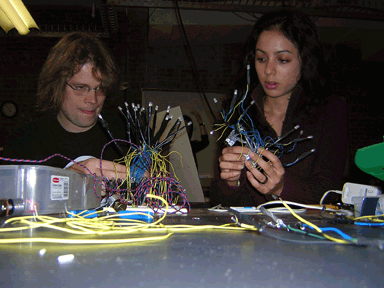
The first major issue we came upon was a logistical one. We chose to use 36 tri-color LEDs, each of which had four leads, three of which needing resistors and all of which requiring extra lengths of wire. We came up with a system of creating LED flowers groups of 8 LEDs that could be plugged into the breadboard with homemade sockets, but the sheer amount of soldering and cutting of wire was daunting. I estimate we put in 30 hours total just putting together the LED flowers. This limited the scope of the project and prevented us from, in the end, extending the project by creating more interesting control systems and ways of creating patterns with the LED lights, unfortunately.
The most time consuming part of this project was soldering the LEDS 64*4=256 one to red, greeen, blue and ground cables. Then soldering the ends of the red, green and blue cables to 220 Ohm resistors (64*3=192). So that was a total 256+192= 448 soldering! But, that was not the end of the soldering: we also had to solder the transistors (3 cables * how many tansistors?)
We did learn how to use transistors as a part of this project. Since each PIC pin needed to control four LEDs, we needed to use a transistor to draw enough power. We ended up soldering together 27 transistors for each of the 27 pins used. We also discovered we needed to insulate the metal caps of the transistors for them to work properly: At first we had them all clustered together, many touching, and many of our LEDs lit up very weakly. Once pieces of electrical tape were placed over the caps of each transistor, the LEDs worked much better.
In the end, the device itself does mostly work, though it's a huge mess of wires. Several LEDs don't fully work for various reasons, but we simply didn't have the time to cut apart our flowers to troubleshoot and we were worried that we might end up creating more problems than we solved.
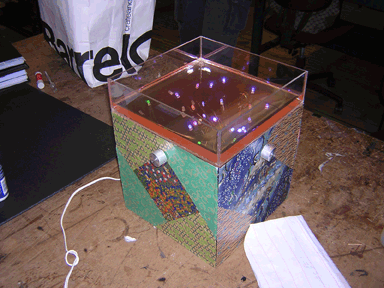
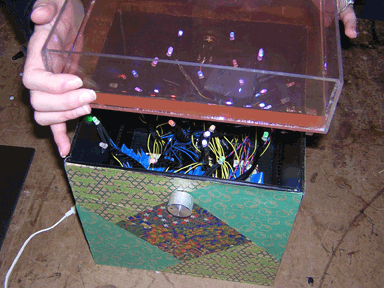
We placed the device in a box we made that was intended to look classic, non-techie and organic, and built a lid filled with liquid (Vitamin Water). We used origami paper that we cut and carefully glued on the side of the plastic box. Each side has a shade, representing either red/green or blue. We added the water element to the box ( water in a plexiglass case) that gives an 'underwater' effect, allowing the LED's to glow. We thought that this would make the effect more serene and natural, despite the tangle of technology inside.
Here is the visual representation of the end result made in processing: model.
If this project were to be redone, we would replace the breadboards with solder boards and probably look for a pic and program to handle job in a simpler way. One reference would be this page.
Last Updated: 11/08/05